
단계별 Jenkins 설치 가이드.
이 기사에서는 다음 운영 체제에 Jenkins를 설치하는 방법을 배웁니다.
위의 모든 운영 체제에서 Jenkins 설치 단계는 약간 다르지만 구성 단계는 동일합니다.
젠킨스란?
젠킨스 개발자가 프로젝트 및 애플리케이션을 실행할 수 있는 오픈 소스 자동화 구축 도구입니다. 소프트웨어 및 응용 프로그램을 구축하고 배포하는 데 사용됩니다. 작업 중인 플랫폼에 관계없이 프로젝트를 지속적으로 통합하고 지속적으로 전달할 수 있는 강력한 자동화 애플리케이션입니다.
Jenkins는 Java 애플리케이션이므로 JRE(Java Runtime Environment)가 설치된 모든 시스템에서 독립 실행형으로 실행됩니다.
Jenkins를 배우고 싶다면 이것을 확인하십시오. 온라인 코스 제로에서 영웅이 되기 위해.
목차
전제 조건
JDK8+는 모든 운영 체제에 필수입니다. 따라서 먼저 JDK8 이상 버전을 설치해야 합니다. 다운받아 설치하시면 됩니다 여기에서.
Windows에서 Jenkins 설치
JDK가 설치되고 실행되면 Jenkins를 다운로드하고 설치할 준비가 된 것입니다. 딸깍 하는 소리 여기 Windows용 최신 Jenkins MSI 패키지를 다운로드합니다.
- jenkins.msi를 두 번 클릭하여 설치를 시작합니다.
- 다음을 클릭한 후 설치

- 다른 디렉토리에 설치하려면 변경 버튼을 클릭하십시오. 이 예에서는 기본 옵션을 유지하고 다음을 클릭합니다.

- 설치 프로세스가 완료되면 마침 버튼을 클릭하여 설치를 완료합니다.
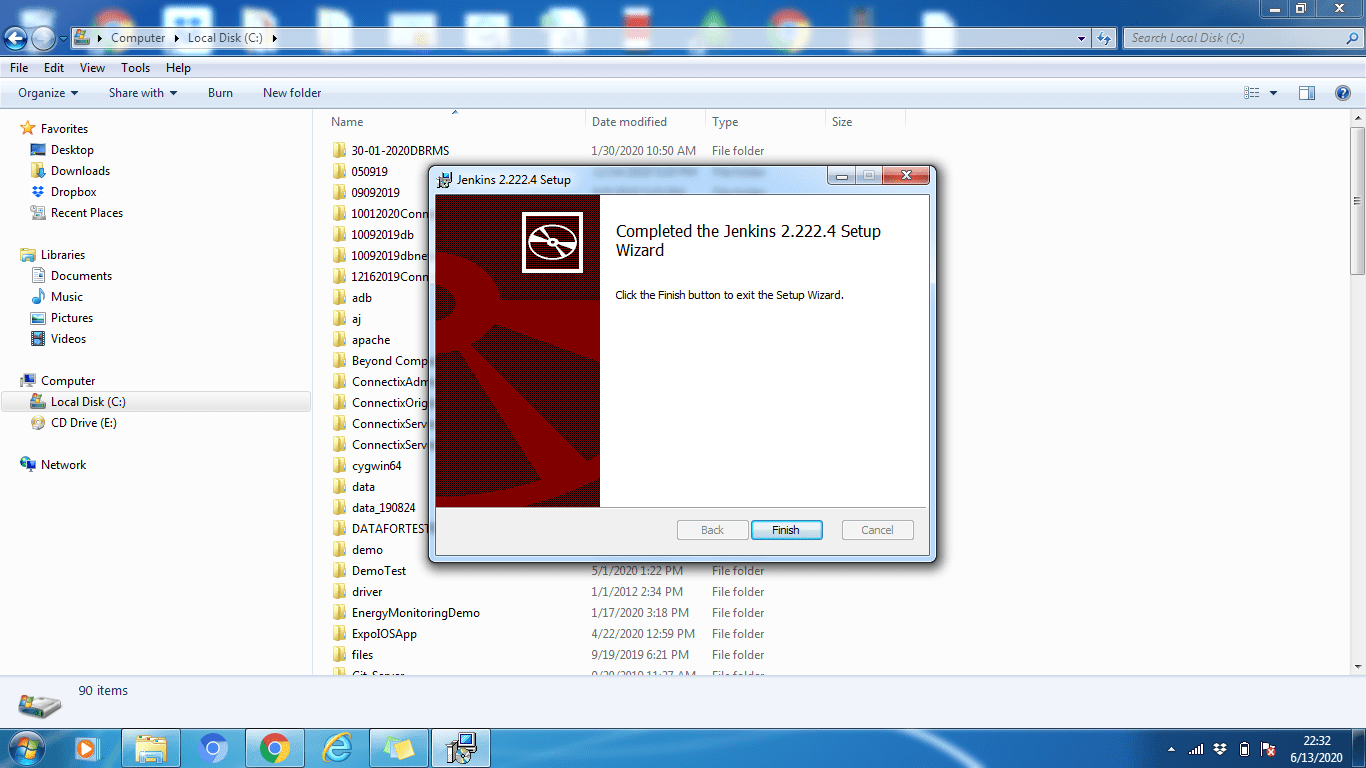
보시다시피 Windows에서 Jenkins 설치는 정말 쉽습니다. 다른 표준 소프트웨어와 마찬가지로.
Ubuntu에 Jenkins 설치
앞서 언급했듯이 JDK8+가 Ubuntu 시스템에 설치되어 실행 중인지 확인하십시오. 설치되어 있지 않으면 아래 명령을 실행하여 설치하십시오.
sudo apt install default-jdk-headless
[email protected]:~$ sudo apt install default-jdk-headless
Reading package lists... Done
Building dependency tree
Reading state information... Done
The following NEW packages will be installed:
  default-jdk-headless
0 upgraded, 1 newly installed, 0 to remove and 102 not upgraded.
Need to get 1132 B of archives.
After this operation, 6144 B of additional disk space will be used.
Get:1 http://archive.ubuntu.com/ubuntu bionic-updates/main amd64 default-jdk-headless amd64 2:1.11-68ubuntu1~18.04.1 [1132 B]
Fetched 1132 B in 2s (676 B/s)
Selecting previously unselected package default-jdk-headless.
(Reading database ... 30061 files and directories currently installed.)
Preparing to unpack .../default-jdk-headless_2%3a1.11-68ubuntu1~18.04.1_amd64.deb ...
Unpacking default-jdk-headless (2:1.11-68ubuntu1~18.04.1) ...
Setting up default-jdk-headless (2:1.11-68ubuntu1~18.04.1) ...
[email protected]:~$
Java가 성공적으로 설치되었는지 확인하려면 아래 명령을 실행하십시오.
자바 버전
[email protected]:~$ java -version
openjdk version "11.0.7" 2020-04-14
OpenJDK Runtime Environment (build 11.0.7+10-post-Ubuntu-2ubuntu218.04)
OpenJDK 64-Bit Server VM (build 11.0.7+10-post-Ubuntu-2ubuntu218.04, mixed mode, sharing)
[email protected]:~$
설치가 완료되면 Jenkins 설치로 이동합니다.
설치 단계:
1단계 : 먼저 명령 터미널 열기(Ctrl + Alt + T)
2단계: Jenkins 설치를 위해 시스템에 저장소 키를 추가해 보겠습니다.
wget -q -O – http://pkg.jenkins-ci.org/debian/jenkins-ci.org.key | sudo apt-key 추가 –
[email protected]:~$ wget -q -O - http://pkg.jenkins-ci.org/debian/jenkins-ci.org.key | sudo apt-key add -
OK
[email protected]:~$
3단계: 키가 추가되면 시스템에 Debian 패키지 저장소 주소를 추가해야 합니다.
sudo sh -c ‘echo deb http://pkg.jenkins-ci.org/debian-stable 바이너리/ > /etc/apt/sources.list.d/jenkins .목록’
4단계: 이제 Ubuntu 패키지 업데이트
sudo apt 업데이트
[email protected]:~$ sudo apt update
Hit:1 http://archive.ubuntu.com/ubuntu bionic InRelease
Get:2 http://archive.ubuntu.com/ubuntu bionic-updates InRelease [88.7 kB]
Ign:3 http://pkg.jenkins-ci.org/debian-stable binary/ InRelease
Get:4 http://pkg.jenkins-ci.org/debian-stable binary/ Release [2044 B]
Get:5 http://pkg.jenkins-ci.org/debian-stable binary/ Release.gpg [195 B]
Get:6 http://archive.ubuntu.com/ubuntu bionic-backports InRelease [74.6 kB]
Get:7 http://archive.ubuntu.com/ubuntu bionic/universe amd64 Packages [8570 kB]
Get:8 http://pkg.jenkins-ci.org/debian-stable binary/ Packages [17.6 kB]
Get:9 http://security.ubuntu.com/ubuntu bionic-security InRelease [88.7 kB]
Get:10 http://security.ubuntu.com/ubuntu bionic-security/main amd64 Packages [748 kB]
Get:11 http://security.ubuntu.com/ubuntu bionic-security/main Translation-en [237 kB]
Get:12 http://security.ubuntu.com/ubuntu bionic-security/restricted amd64 Packages [50.8 kB]
Get:13 http://security.ubuntu.com/ubuntu bionic-security/restricted Translation-en [12.3 kB]
Get:14 http://security.ubuntu.com/ubuntu bionic-security/universe amd64 Packages [673 kB]
Get:15 http://security.ubuntu.com/ubuntu bionic-security/universe Translation-en [223 kB]
Get:16 http://security.ubuntu.com/ubuntu bionic-security/multiverse amd64 Packages [7808 B]
Get:17 http://security.ubuntu.com/ubuntu bionic-security/multiverse Translation-en [2856 B]
Get:18 http://archive.ubuntu.com/ubuntu bionic/universe Translation-en [4941 kB]
Get:19 http://archive.ubuntu.com/ubuntu bionic/multiverse amd64 Packages [151 kB]
Get:20 http://archive.ubuntu.com/ubuntu bionic/multiverse Translation-en [108 kB]
Get:21 http://archive.ubuntu.com/ubuntu bionic-updates/main amd64 Packages [969 kB]
Get:22 http://archive.ubuntu.com/ubuntu bionic-updates/main Translation-en [329 kB]
Get:23 http://archive.ubuntu.com/ubuntu bionic-updates/restricted amd64 Packages [60.5 kB]
Get:24 http://archive.ubuntu.com/ubuntu bionic-updates/restricted Translation-en [14.7 kB]
Get:25 http://archive.ubuntu.com/ubuntu bionic-updates/universe amd64 Packages [1085 kB]
Get:26 http://archive.ubuntu.com/ubuntu bionic-updates/universe Translation-en [337 kB]
Get:27 http://archive.ubuntu.com/ubuntu bionic-updates/multiverse amd64 Packages [15.9 kB]
Get:28 http://archive.ubuntu.com/ubuntu bionic-updates/multiverse Translation-en [6420 B]
Get:29 http://archive.ubuntu.com/ubuntu bionic-backports/main amd64 Packages [7516 B]
Get:30 http://archive.ubuntu.com/ubuntu bionic-backports/main Translation-en [4764 B]
Get:31 http://archive.ubuntu.com/ubuntu bionic-backports/universe amd64 Packages [7484 B]
Get:32 http://archive.ubuntu.com/ubuntu bionic-backports/universe Translation-en [4436 B]
Fetched 18.8 MB in 58s (327 kB/s)
Reading package lists... Done
Building dependency tree
Reading state information... Done
102 packages can be upgraded. Run 'apt list --upgradable' to see them.
[email protected]:~$
5단계: 마지막으로 Jenkins를 설치하려면 아래 명령을 실행합니다.
sudo apt install 젠킨스
[email protected]:~$ sudo apt install jenkins
Reading package lists... Done
Building dependency tree
Reading state information... Done
The following additional packages will be installed:
  daemon
The following NEW packages will be installed:
  daemon jenkins
0 upgraded, 2 newly installed, 0 to remove and 102 not upgraded.
Need to get 65.7 MB of archives.
After this operation, 66.8 MB of additional disk space will be used.
Do you want to continue? [Y/n] Y
Get:1 http://archive.ubuntu.com/ubuntu bionic/universe amd64 daemon amd64 0.6.4-1build1 [99.5 kB]
Get:2 http://pkg.jenkins-ci.org/debian-stable binary/ jenkins 2.235.1 [65.6 MB]
Fetched 65.7 MB in 3min 34s (307 kB/s)
Selecting previously unselected package daemon.
(Reading database ... 29242 files and directories currently installed.)
Preparing to unpack .../daemon_0.6.4-1build1_amd64.deb ...
Unpacking daemon (0.6.4-1build1) ...
Selecting previously unselected package jenkins.
Preparing to unpack .../jenkins_2.235.1_all.deb ...
Unpacking jenkins (2.235.1) ...
Setting up daemon (0.6.4-1build1) ...
Setting up jenkins (2.235.1) ...
invoke-rc.d: could not determine current runlevel
Processing triggers for systemd (237-3ubuntu10.39) ...
Processing triggers for man-db (2.8.3-2ubuntu0.1) ...
Processing triggers for ureadahead (0.100.0-21) ...
[email protected]:~$
Jenkins가 성공적으로 설치되었습니다. 이제 Jenkins 서버를 시작할 수 있습니다.
6단계: systemctl 명령을 통해 Jenkins 시작
sudo systemctl 젠킨스 시작
systemctl은 출력을 보여주지 않으므로 아래 명령어를 통해 상태를 확인할 수 있습니다. 이 명령어를 통해 Jenkins의 활성 여부를 확인할 수 있습니다.
sudo systemctl 상태 젠킨스
[email protected]:~$ sudo systemctl status jenkins
● jenkins.service - LSB: Start Jenkins at boot time
   Loaded: loaded (/etc/init.d/jenkins; generated)
   Active: active (exited) since Sat 2020-04-04 10:10:19 UTC; 2 months 16 days ago
     Docs: man:systemd-sysv-generator(8)
    Tasks: 0 (limit: 4915)
   CGroup: /system.slice/jenkins.service

Apr 04 10:10:18 ip-172-31-17-25 systemd[1]: Starting LSB: Start Jenkins at boot time...
Apr 04 10:10:18 ip-172-31-17-25 jenkins[1984]: Correct java version found
Apr 04 10:10:18 ip-172-31-17-25 jenkins[1984]:  * Starting Jenkins Automation Server jenkins
Apr 04 10:10:18 ip-172-31-17-25 su[2037]: Successful su for root by root
Apr 04 10:10:18 ip-172-31-17-25 su[2037]: + ??? root:root
Apr 04 10:10:18 ip-172-31-17-25 su[2037]: pam_unix(su:session): session opened for user root by (uid=0)
Apr 04 10:10:18 ip-172-31-17-25 jenkins[1984]: mesg: ttyname failed: Inappropriate ioctl for device
Apr 04 10:10:18 ip-172-31-17-25 su[2037]: pam_unix(su:session): session closed for user root
Apr 04 10:10:19 ip-172-31-17-25 jenkins[1984]:    ...done.
Apr 04 10:10:19 ip-172-31-17-25 systemd[1]: Started LSB: Start Jenkins at boot time.
[email protected]:~$
6단계: 포트 구성(선택 사항)
기본적으로 Jenkins는 8080 포트에서 실행되며 이 포트를 어디서나(접근할 수 없는 경우) 액세스할 수 있도록 해야 합니다.
포트를 열자:
sudo ufw 8080 허용
다음 명령 아래에서 포트 상태를 확인할 수 있습니다.
sudo ufw 상태
[email protected]:~$ sudo ufw status
Status: active
To           Action           From
--           ------           ----
8080         ALLOW            Anywhere
8080 (v6)    ALLOW            Anywhere (v6)
[email protected]:~$
방화벽 비활성 상태가 표시되면 다음 명령을 실행하십시오. 그렇지 않으면 필요하지 않습니다.
sudo ufw OpenSSH 허용
뒤이어
sudo ufw enable
CentOS에 Jenkins 설치
먼저 JDK8+가 컴퓨터에 설치되어 실행 중인지 확인하십시오. 설치되어 있지 않으면 아래 명령을 실행하여 OpenJDK 8 패키지를 설치합니다.
sudo yum install java-1.8.0-openjdk-devel
[[email protected] ~]$ sudo yum install java-1.8.0-openjdk-devel
CentOS-8 - AppStream                            1.0 kB/s | 4.3 kB     00:04
CentOS-8 - AppStream                            397 kB/s | 5.8 MB     00:14
CentOS-8 - Base                                 3.5 kB/s | 3.9 kB     00:01
CentOS-8 - Extras                               547  B/s | 1.5 kB     00:02
Jenkins-stable                                  6.5 kB/s | 2.9 kB     00:00
Dependencies resolved.
================================================================================
 Package                   Arch    Version                     Repository  Size
================================================================================
Installing:
 java-1.8.0-openjdk-devel  x86_64  1:1.8.0.252.b09-3.el8_2     AppStream  9.8 M

Transaction Summary
================================================================================
Install  1 Package

Total download size: 9.8 M
Installed size: 41 M
Is this ok [y/N]: y
Downloading Packages:
java-1.8.0-openjdk-devel-1.8.0.252.b09-3.el8_2. 531 kB/s | 9.8 MB     00:18
--------------------------------------------------------------------------------
Total                                           507 kB/s | 9.8 MB     00:19
Running transaction check
Transaction check succeeded.
Running transaction test
Transaction test succeeded.
Running transaction
  Preparing        :                                                        1/1
  Installing       : java-1.8.0-openjdk-devel-1:1.8.0.252.b09-3.el8_2.x86   1/1
  Running scriptlet: java-1.8.0-openjdk-devel-1:1.8.0.252.b09-3.el8_2.x86   1/1
  Verifying        : java-1.8.0-openjdk-devel-1:1.8.0.252.b09-3.el8_2.x86   1/1
Installed products updated.

Installed:
  java-1.8.0-openjdk-devel-1:1.8.0.252.b09-3.el8_2.x86_64

Complete!
[[email protected] ~]$
Java가 성공적으로 설치되었는지 확인하려면 아래 명령을 실행하십시오.
java -version
[[email protected] ~]$ java -version
openjdk version "1.8.0_252"
OpenJDK Runtime Environment (build 1.8.0_252-b09)
OpenJDK 64-Bit Server VM (build 25.252-b09, mixed mode)
[[email protected] ~]$
설치가 완료되면 Jenkins 설치로 이동합니다.
설치 단계
1단계: 먼저 명령 터미널을 엽니다.
2단계: Jenkins를 설치하려면 먼저 Jenkins GPG 키를 다운로드하여 추가해야 합니다.
sudo wget -O /etc/yum.repos.d/jenkins.repo http://pkg.jenkins-ci.org/redhat-stable/jenkins.repo
[[email protected] ~]$ sudo wget -O /etc/yum.repos.d/jenkins.repo http://pkg.jenkins-ci.org/redhat-stable/jenkins.repo
--2020-06-21 04:29:52--  http://pkg.jenkins-ci.org/redhat-stable/jenkins.repo
Resolving pkg.jenkins-ci.org (pkg.jenkins-ci.org)... 52.202.51.185, 64:ff9b::34ca:33b9
Connecting to pkg.jenkins-ci.org (pkg.jenkins-ci.org)|52.202.51.185|:80... connected.
HTTP request sent, awaiting response... 200 OK
Length: 85
Saving to: ‘/etc/yum.repos.d/jenkins.repo’

/etc/yum.repos.d/je 100%[==================>]      85  --.-KB/s    in 0s

2020-06-21 04:29:54 (2.61 MB/s) - ‘/etc/yum.repos.d/jenkins.repo’ saved [85/85]

[[email protected] ~]$
3단계: Jenkins GPS 키를 다운로드하여 추가한 후 Jenkins GPG 키 가져오기:
sudo rpm --import https://jenkins-ci.org/redhat/jenkins-ci.org.key
4단계: CentOS 패키지 업데이트
sudo yum update
[[email protected] ~]$ sudo yum update
Last metadata expiration check: 0:17:09 ago on Sun 21 Jun 2020 04:21:20 AM PDT.
Dependencies resolved.
Nothing to do.
Complete!
[[email protected] ~]$
5단계: centos 패키지를 업데이트한 후 Jenkins를 설치할 준비가 되었습니다.
sudo yum install jenkins
[[email protected] ~]$ sudo yum install jenkins
Last metadata expiration check: 0:19:26 ago on Sun 21 Jun 2020 04:21:20 AM PDT.
Dependencies resolved.
===============================================================================
 Package          Architecture    Version               Repository        Size
===============================================================================
Installing:
 jenkins          noarch          2.235.1-1.1           jenkins           63 M

Transaction Summary
===============================================================================
Install  1 Package

Total download size: 63 M
Installed size: 63 M
Is this ok [y/N]: y
Downloading Packages:
jenkins-2.235.1-1.1.noarch.rpm                 172 kB/s |  63 MB     06:16
-------------------------------------------------------------------------------
Total                                          172 kB/s |  63 MB     06:16
Running transaction check
Transaction check succeeded.
Running transaction test
Transaction test succeeded.
Running transaction
  Preparing        :                                                       1/1
  Running scriptlet: jenkins-2.235.1-1.1.noarch                            1/1
  Installing       : jenkins-2.235.1-1.1.noarch                            1/1
  Running scriptlet: jenkins-2.235.1-1.1.noarch                            1/1
  Verifying        : jenkins-2.235.1-1.1.noarch                            1/1
Installed products updated.

Installed:
  jenkins-2.235.1-1.1.noarch

Complete!
[[email protected] ~]$
6단계: systemctl을 통해 Jenkins 시작
sudo systemctl start jenkins
systemctl은 출력을 보여주지 않기 때문에 아래 명령어를 통해 상태를 확인할 수 있습니다. 그리고 이 명령어를 통해 Jenkins의 활성화 여부를 확인할 수 있습니다.
sudo systemctl status jenkins
[[email protected] ~]$ sudo systemctl status jenkins
[sudo] password for koreantech.org:
● jenkins.service - LSB: Jenkins Automation Server
   Loaded: loaded (/etc/rc.d/init.d/jenkins; generated)
   Active: active (running)
     Docs: man:systemd-sysv-generator(8)

Jun 20 11:15:22 localhost.localdomain systemd[1]: Starting LSB: Jenkins Automa>
Jun 20 11:15:23 localhost.localdomain runuser[1456]: pam_unix(runuser:session)>
Jun 20 11:15:33 localhost.localdomain jenkins[1433]: Starting Jenkins [  OK  ]
Jun 20 11:15:33 localhost.localdomain systemd[1]: Started LSB: Jenkins Automat>
Jun 21 04:23:04 localhost.localdomain systemd[1]: Stopping LSB: Jenkins Automa>
[[email protected] ~]$
7단계: 포트 구성(선택 사항)
기본적으로 Jenkins는 8080 포트에서 실행되며 이 포트를 어디에서나 액세스할 수 있도록 해야 합니다(액세스할 수 없는 경우에만). 항구를 열자,
sudo firewall-cmd --permanent --zone=public --add-port=8080/tcp
[[email protected] ~]$ sudo firewall-cmd --permanent --zone=public --add-port=8080/tcp
success
[[email protected] ~]$
포트 재로드 방화벽을 구성한 후
sudo firewall-cmd --reload
[[email protected] ~]$ sudo firewall-cmd --reload
success
[[email protected] ~]$
Jenkins 구성
Jenkins가 설치되면 포트 8080에서 실행됩니다. 즐겨 사용하는 브라우저에서 http://localhost:8080으로 이동하여 구성해 보겠습니다.
1단계: 방문 http://localhost:8080
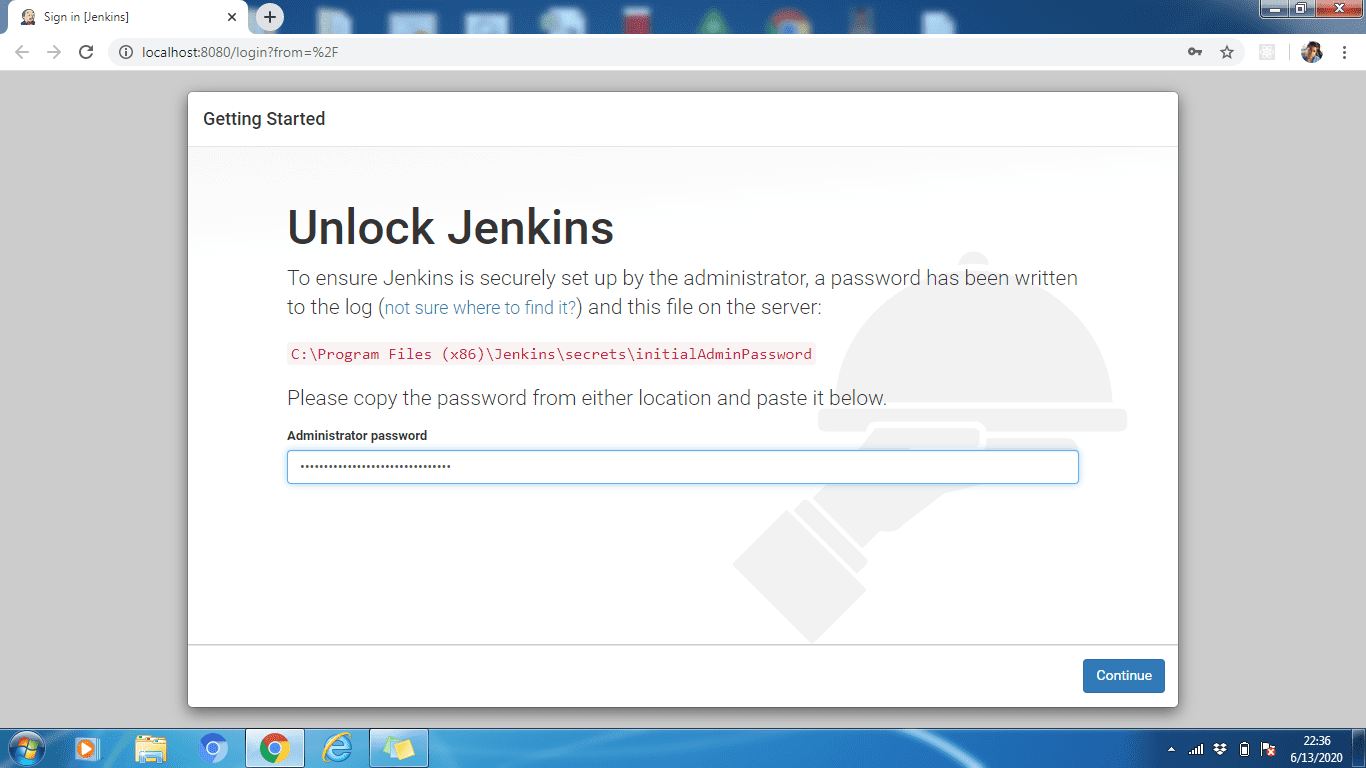
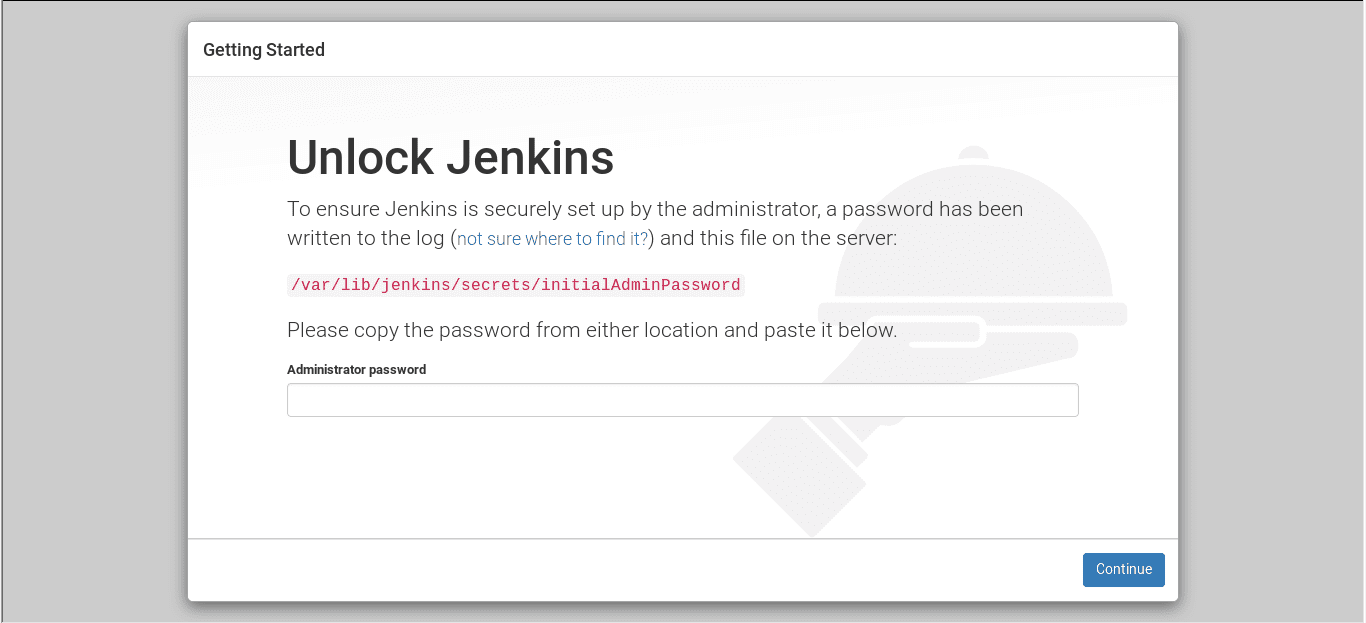
2단계: Jenkins의 잠금을 해제하려면 다음 위치에 있는 파일에서 관리자 암호를 복사합니다.
C:프로그램 파일(x86)JenkinssecretsinitialAdminPassword
/var/lib/jenkins/secrets/initialAdminPassword
이제 붙여넣기 관리자 비밀번호 필드. 그런 다음 계속하다 단추.
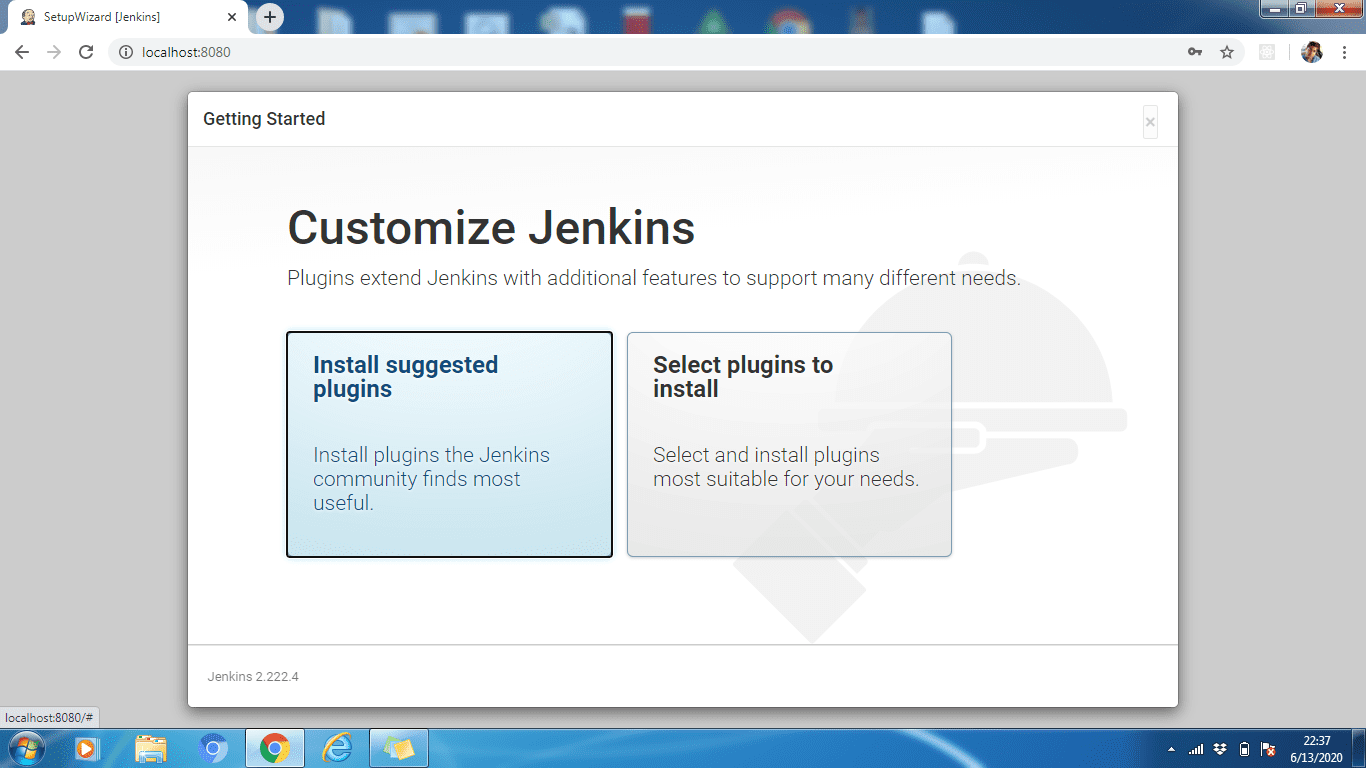
3단계: 제안된 플러그인을 설치하거나 사용 사례에 따라 플러그인을 선택할 수 있습니다. 여기에 제안된 플러그인을 설치합니다.
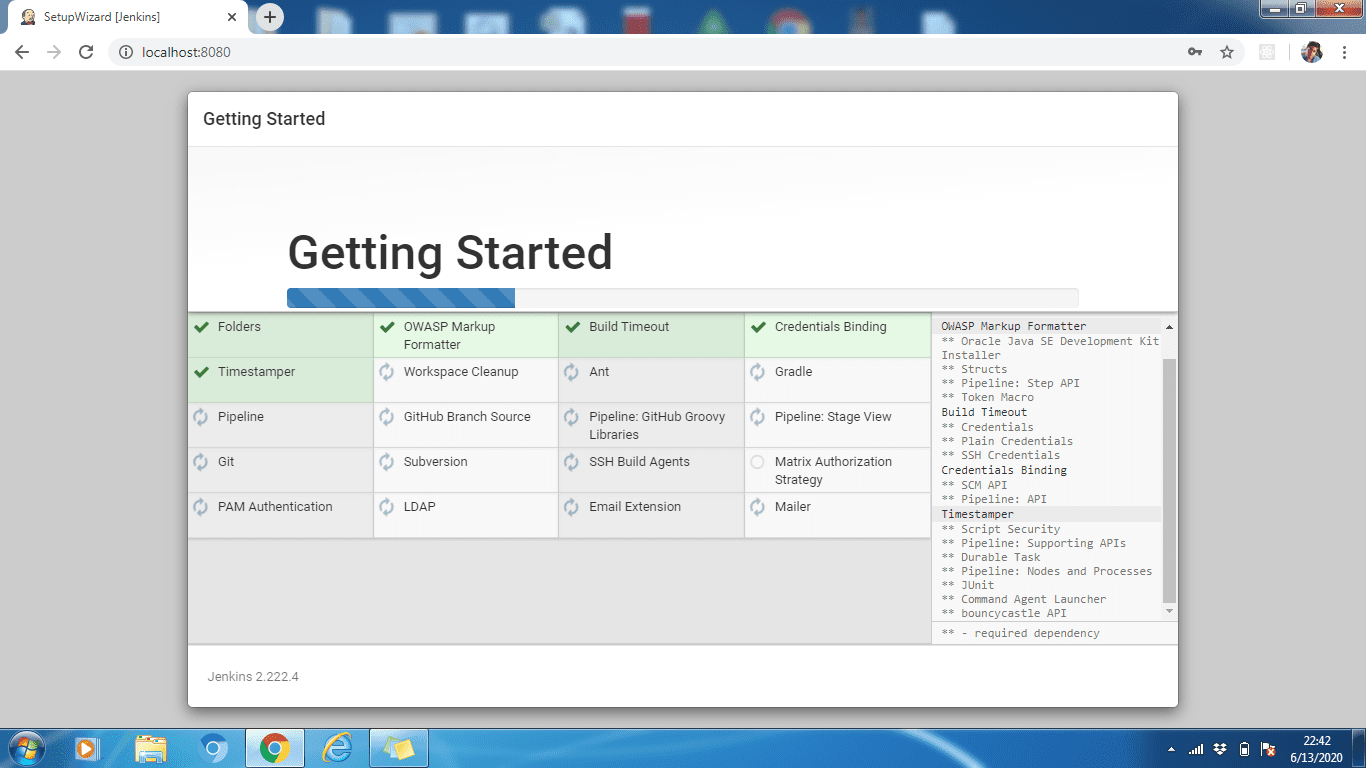
4단계: 모든 플러그인이 설치될 때까지 기다리세요. 설치가 완료되면 계속을 클릭합니다.
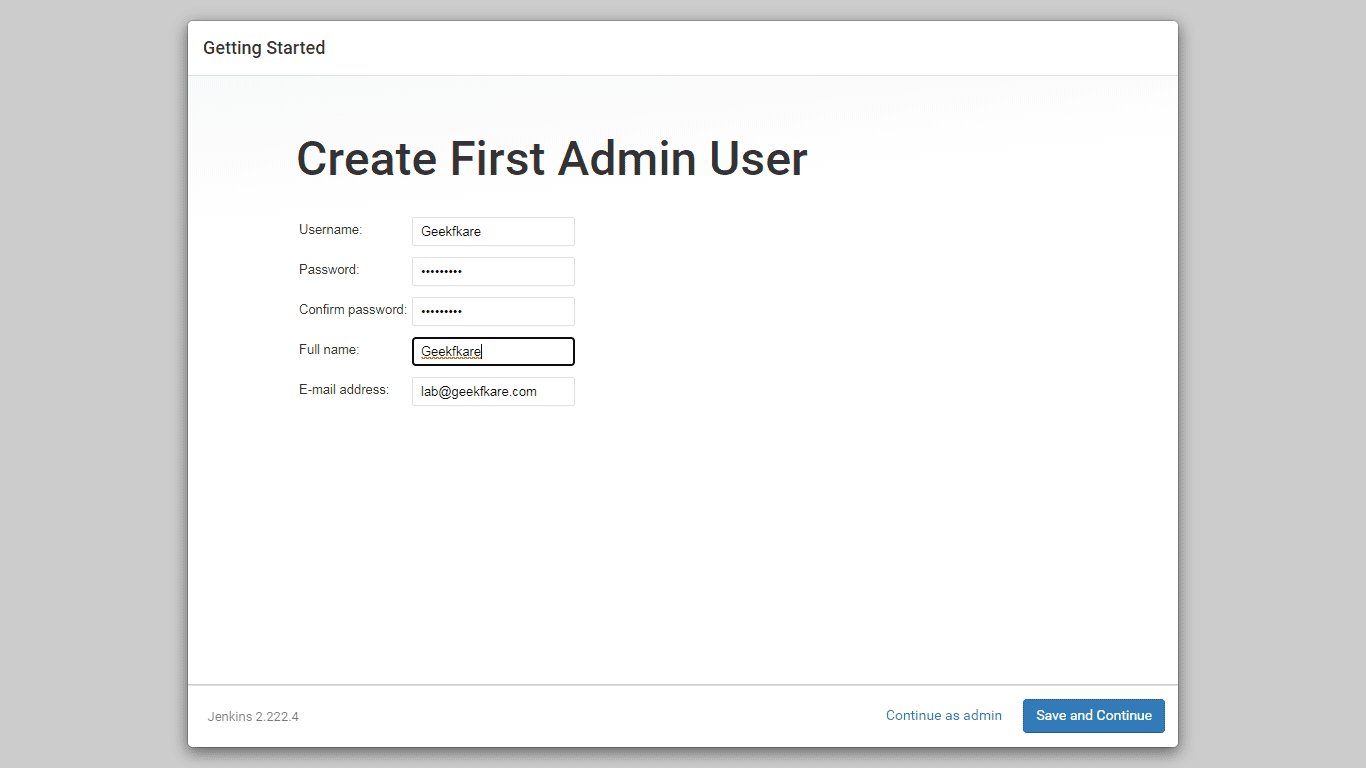
5단계: Jenkins에 대한 관리자 프로필을 만듭니다. 필요한 세부 정보를 입력하고 저장하고 계속하기를 클릭합니다.
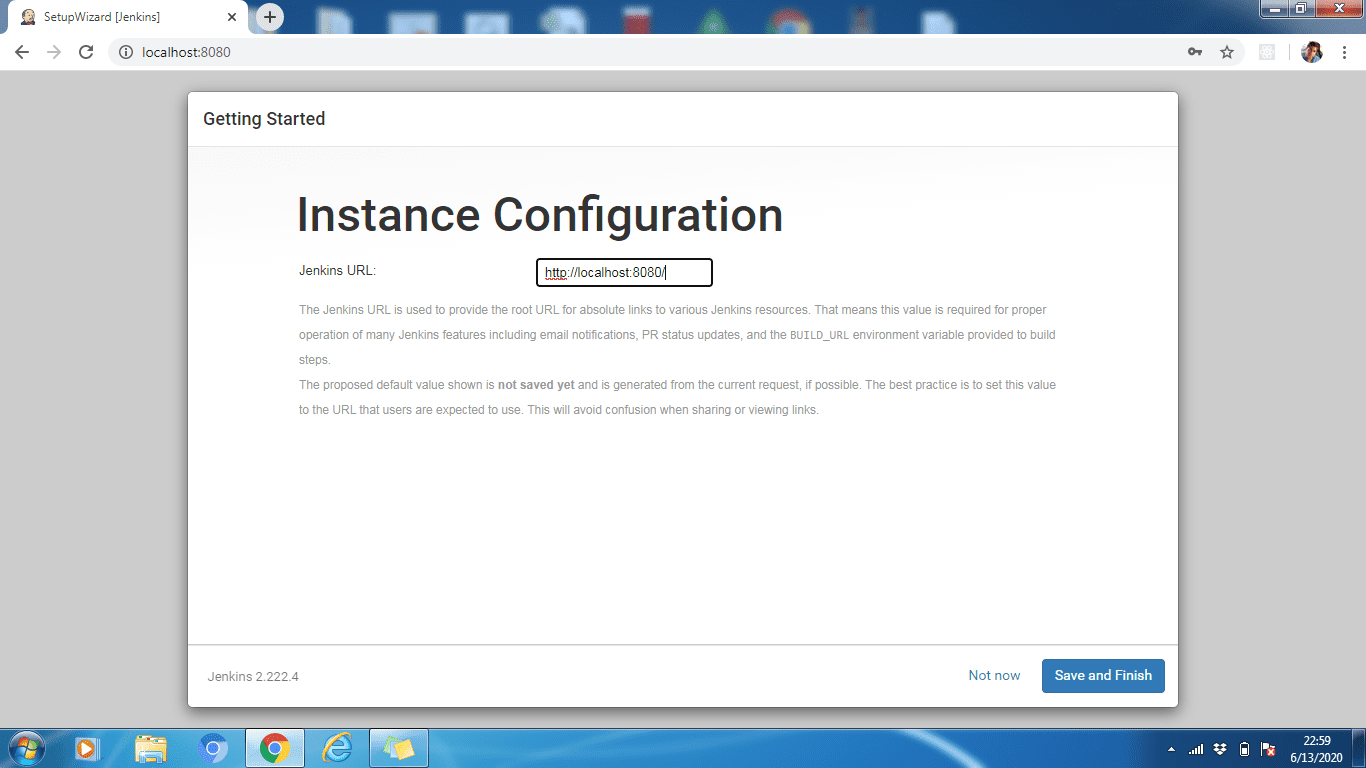
6단계: 필요한 경우 Jenkins URL을 변경할 수 있습니다. 기본값인 http://localhost:8080으로 유지하겠습니다. 저장 및 완료를 클릭하여 구성 프로세스를 완료하십시오. 이제 Jenkins 사용 시작을 클릭하십시오.

마지막으로 설정 프로세스가 완료되고 위의 프로세스가 기본값인 Welcome to Jenkins입니다! 페이지.
Jenkins 구성 단계는 관리자 암호를 검색하고 입력해야 하는 2단계를 제외하고 모든 OS에서 유사합니다. 이 암호는 파일에서 검색할 수 있으며 Jenkins UI 잠금 해제에 표시된 경로에 저장할 수 있습니다.
결론
따라서 위의 단계는 좋아하는 OS에 Jenkins를 설치하는 단계였습니다. 다음으로 첫 번째 Jenkins 파이프라인을 만드는 방법을 알아봅니다.
Jenkins 설치는 쉽고 원격 팀을 위해 설정하는 경우 Cloud VM을 가져와 직접 설치하거나 Jenkins 호스팅 플랫폼으로 이동할 수 있습니다.